
男物の着物の着方を掲載します。
男性の方もどんどん着物を着ましょう!
必要な物・・・
着流し:着物×1・襦袢×1・帯×1・腰紐×2・足袋×1組・雪駄か下駄×1
着物と羽織:着物×1・羽織×1・襦袢×1・帯×1・腰紐×2・足袋×1組・羽織紐×1・雪駄か下駄×1
着物と袴:着物×1・袴×1・襦袢×1・帯×1・腰紐×2・足袋×1組・雪駄か下駄×1
最低限上記が必要ですがより正式には半襦袢を襦袢の下に着ると良いです。
また襦袢に半衿が付属していない場合は半衿も必要になります。
----------------------------------------------------------------------------
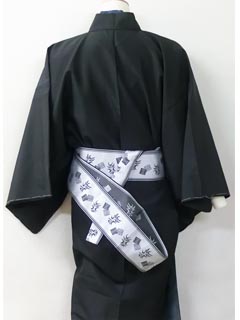
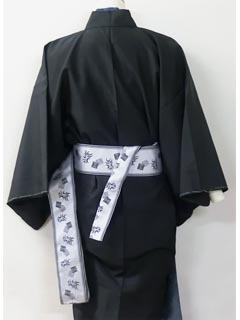
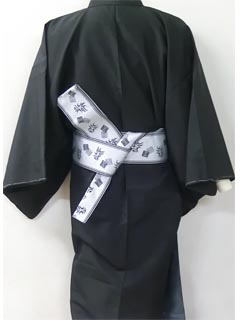
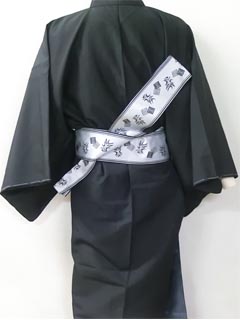
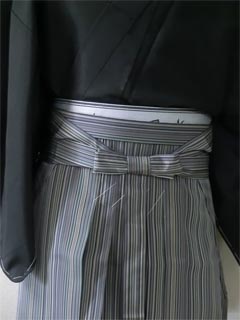
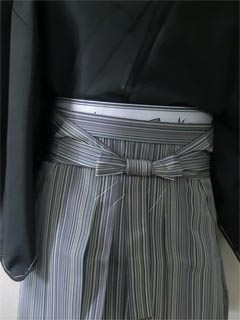
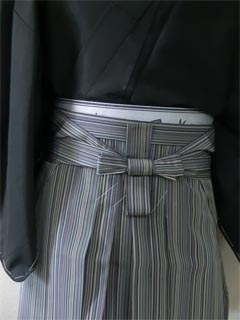
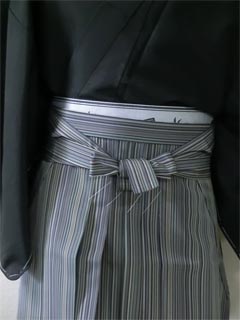
今回は角帯の結び方は貝の口、袴の履き方は十文字結びです。
(ちなみに袴の十文字結びは儀式、結婚式など祝儀の時にします)
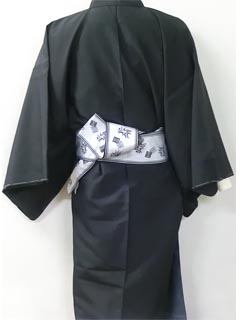
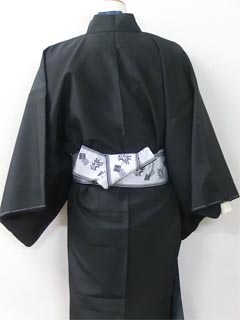
男の着物の着付け(帯結びは貝の口)

まず長襦袢を羽織ります。
寒い場合は中にシャツや肌襦袢を着ても良いと思います。
腰紐を腰骨の上で結びます。
腰紐を前→後で交差→前へと持ってきます。

腰紐を一回ねじります。
その後、腰紐をそのままねじると、輪っか状の隙間が出来ます。
そのわっか状の隙間に紐を"途中まで"通します。
通した紐以外の紐の端を引くと結び目が締まります。
余った長さの紐の端の部分が邪魔になるので紐の下に挟み込みます。
長襦袢の着付けの完成です。
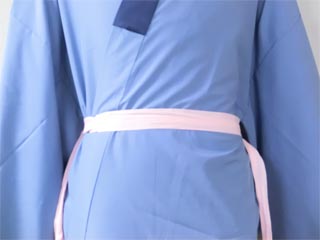
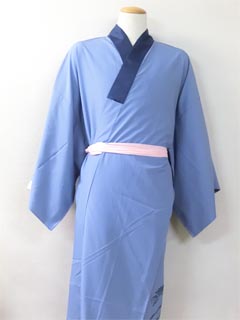
着物を右下、左上に衿を重ねて、
背中の背中心の縫い目を真ん中にして羽織ります。
腰紐を襦袢と同じように締めます。
背中心がずれたら直して整えます。
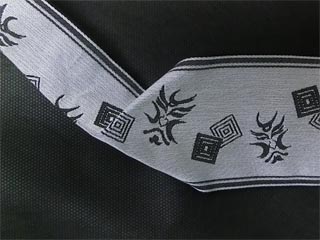
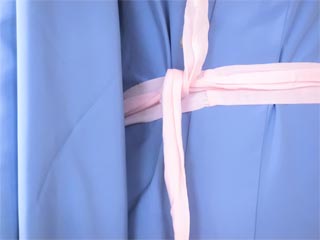
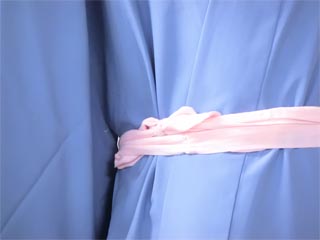
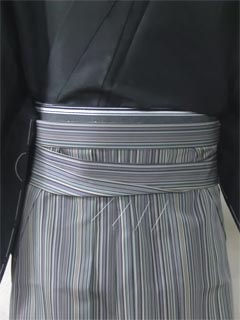
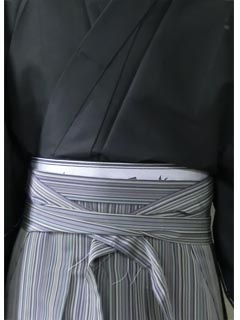
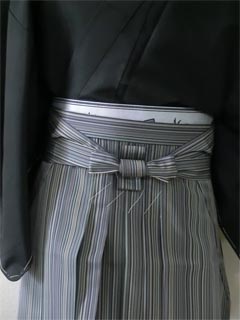
角帯の片方の端を約40センチほど縦方向に半分に折ります。
その時、折った部分の根本を写真の様に折っておくと後々が楽です。
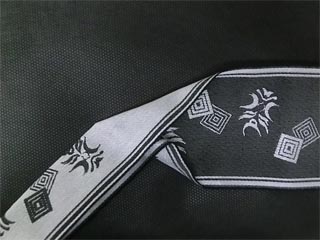
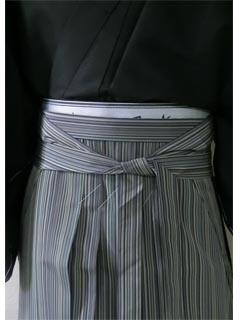
折った部分の裏から見た状態です。
角帯の半分に折った側の端を左上にして背中心の腰紐の上に置きます。
角帯を2~3周、腰の周りに巻きます。
角帯の折っていない、広い側の端を内側に折り込みます。
その時、体側から約50センチくらいの長さになる様に調節しましょう。
角帯の折っていない、広い側の端も整えます。
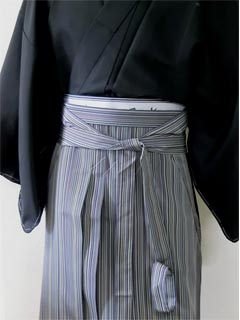
角帯の半分に折っている狭い方の端を下に下げ、その周りを巻くように、
折っていない、広い側の端で外側から内側に折り、上に引きます。
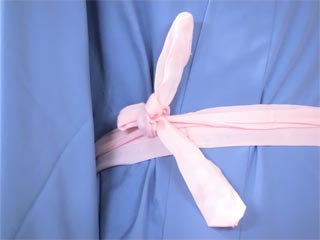
角帯の広い方を向かって右上に、狭い方の端を向かって左下にして、
両端を引き締めます。
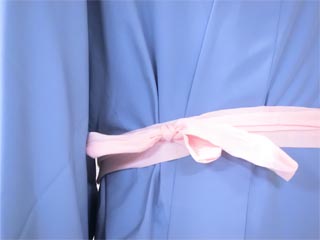
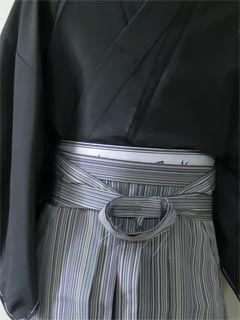
角帯の広い方の端を下側に折り、外から内側に折り、左上に持って来ます。
(わっか状になります)
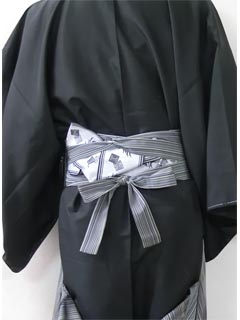
角帯の広い方の端でできた輪っか状の中に狭い方の端を通し、締めて整えます。
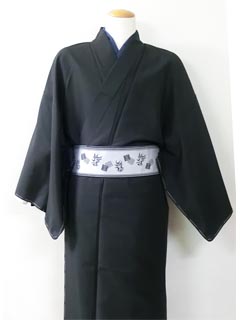
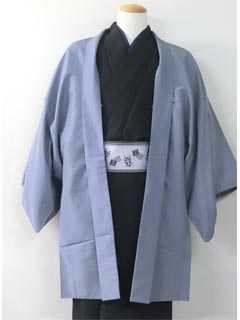
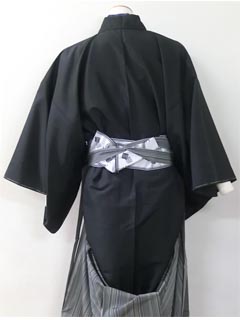
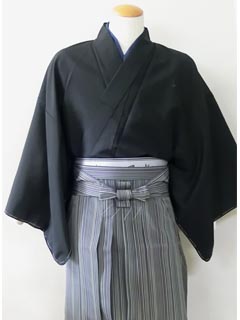
ここで「着流し」スタイルが完成です。
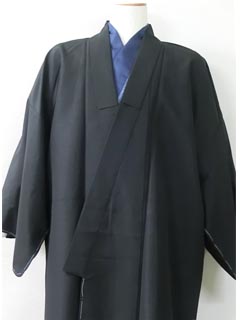
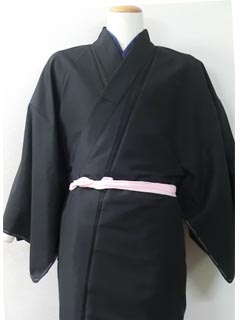
羽織の着付け
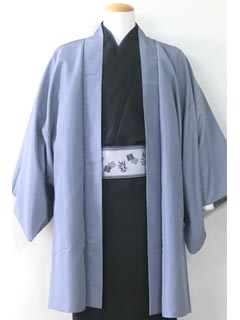
羽織をはおり、背中心を着物と合わせます。
羽織の衿の首あたりの部分を外側に半分に折ります。
羽織の乳(羽織紐を取り付けるわっか状の部分)は折り目の先に
来るようにします。
羽織紐を付けます。
(羽織紐にSかん(S状の金具)が有る場合は乳に引っかけます。
クリップがある場合は羽織の乳の部分の上に取り付けます)
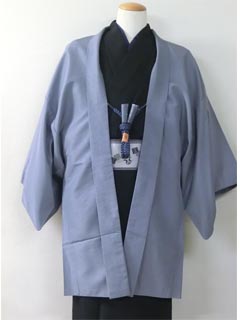
羽織の着方の完成です。
男物の袴の着付け
馬乗り袴の場合、着物と襦袢の裾をたくし上げ着物の腰紐にはさみます。
行灯袴の場合はそのまま、
袴を角帯の上に乗せて合わせます。
角帯は大体1~1.5センチ出るようにします。
袴の前紐を背中側に持ってきて角帯の所で交差します。
他の人に着つけて貰う場合は角帯の所でねじる場合もあります。
この場合の長所は着崩れがしにくいところです。
また短所は角帯と袴の紐に強いしわが出来てしまいます。

前紐を交差した後、前に持ってきて両方の前紐を交差します。
前紐の交差した下側の紐を外から上に折り上げます。
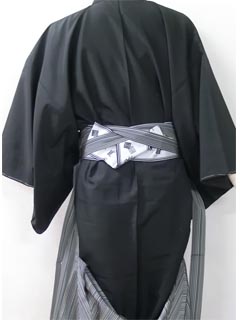
帯結びの下側で蝶々結びをします。
後側を持ってきてへらを帯の内側に差し込みます。
へらがない場合は腰板を帯結びの上に乗せます。
後紐を前にまわして交差した前紐の内側に通します。

交差した後紐の下側の紐を下から前へ、上に、さらに全ての紐の下へ通します。
全ての紐の下へ通した後紐を引っ張って締めます。
もう片方の後紐を10センチくらいの輪っか状にして巻いていきます。
10センチくらいの巻いていった輪っか状の紐を結び目の外側に置きます。
輪っか状の後紐を束ねるように、もう片方の後紐を下から前→上から内側に
巻きます。
繰り返し巻いていって紐の余りの長さが約25センチくらいになるようにします。
紐の余りの長さが約25センチくらいになったら、結び目の内側に通します。
結び目の内側に通した紐を前側に倒します。
紐の端を結び目の後側に差し込みます。
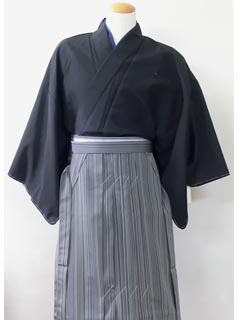
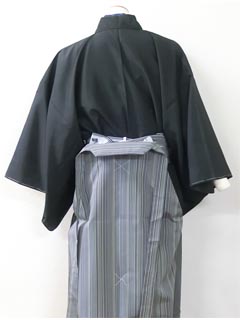
袴の着付けの完成です。
この項目の関連: 正絹 着物 男物 / 洗える着物 男物 / 男物セット / 男性用帯 / 角帯 / 男物袴 / 紋付着物(石持) / 紋入れ加工
京都きもの工房
![]()
#着物着付け自分で #着物着方男 #着物着付け初心者 #howtowearakimono #howtowearakimonomale #男着物着付け #Kimonodressingformen
Here is how to wear a men's kimono.
Men should also wear kimono!
Things you need...
Kimono: 1 kimono, 1 undergarment, 1 obi, 2 waist strings, 1 pair of tabi socks, 1 geta or sandals
Kimono and haori: 1 kimono, 1 haori, 1 undergarment, 1 obi, 2 waist strings, 1 pair of tabi socks, 1 haori string, 1 geta or sandals
Kimono and hakama: 1 kimono, 1 hakama, 1 undergarment, 1 obi, 2 waist strings, 1 pair of tabi socks, 1 geta or sandals
The above items are the minimum required, but it is better to wear a half undergarment under the undergarment for a more formal look.
If your undergarment does not come with a half-collar, you will also need one.
----------------------------------------------------------------------------
This time, we will show you how to tie the square obi in a Kai-no-kuchi style, and how to wear the hakama in a Jūmonji-musubi style.
(By the way, the Jūmonji-musubi style is used for ceremonies, weddings, and other celebrations.)
How to put on a kimono for men (the obi is tied in Kai-no-kuchi style)
First, put on the Naga-juban.
If it's cold, you can wear a shirt or a hada-juban underneath.
Tie the obi above your hip bones.
Bring the obi from the front to the back, then back to the front.
Twist the obi once.
Then, twist the obi as it is to create a loop-shaped gap.
Pass the string through the loop-shaped gap "partway".
Pull the ends of the strings other than the one you passed through to tighten the knot.
The remaining end of the string will get in the way, so tuck it under the string.
The long undergarment is now complete.
Put on the kimono with the collar on the lower right and upper left,
with the center back seam in the middle.
Tighten the waist string in the same way as the undergarment.
If the center back is not aligned, correct it.
Fold one end of the obi in half vertically for about 40 cm.
When you do this, fold the base of the folded part as shown in the picture to make things easier later.
This is the back side of the folded part.
Place the folded end of the square obi on top of the waist string at the center of your back with the top left corner.
Wrap the square obi around your waist 2-3 times.
Fold the unfolded, wide end of the square obi inward.
Adjust it so that it is about 50 cm long from your side.
Also trim the unfolded, wide end of the obi.
Lower the narrow end of the obi that is folded in half, then fold the unfolded, wide end from the outside to the inside as if wrapping it around it, then pull it up.
Pull the wider end of the obi to the upper right and the narrower end to the lower left to tighten both ends.
Fold the wider end of the obi downwards, then fold it from the outside to the inside, and bring it to the upper left.
(It will be in a ring shape)
Pass the narrow end through the ring made by the wider end of the square obi and tighten it to make it even.
The "Kimono Nagare" style is now complete.
Putting on a Haori
Put on a Haori and line up the center of the back with the kimono.
Fold the collar of the Haori around the neck in half outward.
The nipple of the Haori (the loop-shaped part where the Haori string is attached) should be at the end of the fold.
Attach the haori string.
(If the haori string has an S-shaped metal fitting, hook it around your breasts.
If it has a clip, attach it above the breasts of the haori.)
The haori is now complete.
How to put on men's hakama
For Uma-Nori Hakama, tuck up the hems of the kimono and undergarment and place them in the kimono's waist string.
For Andon Hakama, leave it as it is and place the hakama on top of the square obi.
The kaku-obi should stick out about 1 to 1.5 cm.
Bring the front strings of the hakama to the back and cross them at the kaku-obi.
If someone else is helping you put it on, you may want to twist it at the kaku-obi.
The advantage of this is that it is less likely to come undone.
The disadvantage is that the kaku-obi and hakama strings will wrinkle easily.
After crossing the front strings, bring them to the front and cross both front strings.
Fold the bottom string of the crossed front strings up from the outside.
Tie a bow below the obi knot.
Bring the back side and insert the spatula inside the obi.
If you don't have a spatula, place the waist board on top of the obi knot.
Turn the back string forward and pass it inside the crossed front string.
Pass the lower string of the crossed rear string from the bottom to the front, then up, and then under all the other strings.
Pull the rear string that you passed underneath all the other strings to tighten them.
Wrap the other rear string in a loop about 10 cm long.
Place about 10 cm of the looped string on the outside of the knot.
Wrap the other back string from bottom to front, then from top to inside, as if bundling the looped back strings.
Repeat wrapping until there is about 25 cm of string remaining.
When there is about 25 cm of string remaining, pass it through the inside of the knot.
Fold the string that you passed through the inside of the knot to the front.
Insert the end of the string behind the knot.
The hakama is now complete.
Related to this item: Genuine silk kimono for men / Washable kimono for men / Men's set / Men's obi / square obi /